.htaccess file in a stylized formRecently I was working on a WordPress block with custom REST endpoints and I had an interesting challenge — enable pretty permalinks in a development environment running on top of @wordpress/env (wp-env).
If you didn’t know, WordPress won’t automatically redirect endpoint calls to the registered routes, unless you have pretty permalinks enabled. This also applies to posts, pages and basically all other permalinks that use URL parameters to pass data and have an associated redirection rule attached to the URL parameter.
If you don’t have pretty permalinks enabled, the custom REST endpoint URL is a bit different. Instead of http://localhost:8888/wp-json/custom-route/ it accepts the REST route as a URL parameter – http://localhost:8888/?rest_route=/custom-route/. And that’s all fine. You just need to be aware of this difference, especially when working in containerized environments based on Docker – such as wp-env.
wp-env lets you easily set up a local WordPress environment for building and testing plugins and themes. Since WordPress blocks are in fact plugins, we can use wp-env for development and testing.
So, how do you enable pretty permalinks in a development environment running on top of wp-env?
Turns out, it’s as easy as creating a .htaccess file with the correct ownership. In short, connect to the Docker container running the WordPress environment, create the .htaccess file and transfer its ownership to the www-data user. Anyway, let’s do it, step by step.
First and foremost, navigate to the folder from which wp-env is started. This is usually the folder of the WordPress plugin, when working with blocks.
Find the name of the Docker container for the running the WordPress environment by typing: docker ps.
Connect to the Docker container and start bash by typing: docker exec -i -t <container id goes here> /bin/bash.
Check if the current folder is the one of the actual WordPress instance by typing: ls -la. You should get a list of the familiar WordPress filesystem.
Create the .htaccess file by typing: touch .htaccess. The file should be created by the root user.
Transfer the ownership of .htaccess to the www-data user by typing: chown www-data:www-data .htaccess.
That’s all! Now you can navigate to the Permalink Settings page (Settings > Permalinks) and change the Permalink structure to anything you like. Pretty permalink redirection should be applied accordingly to all WordPress routes, including custom REST endpoints of plugins.
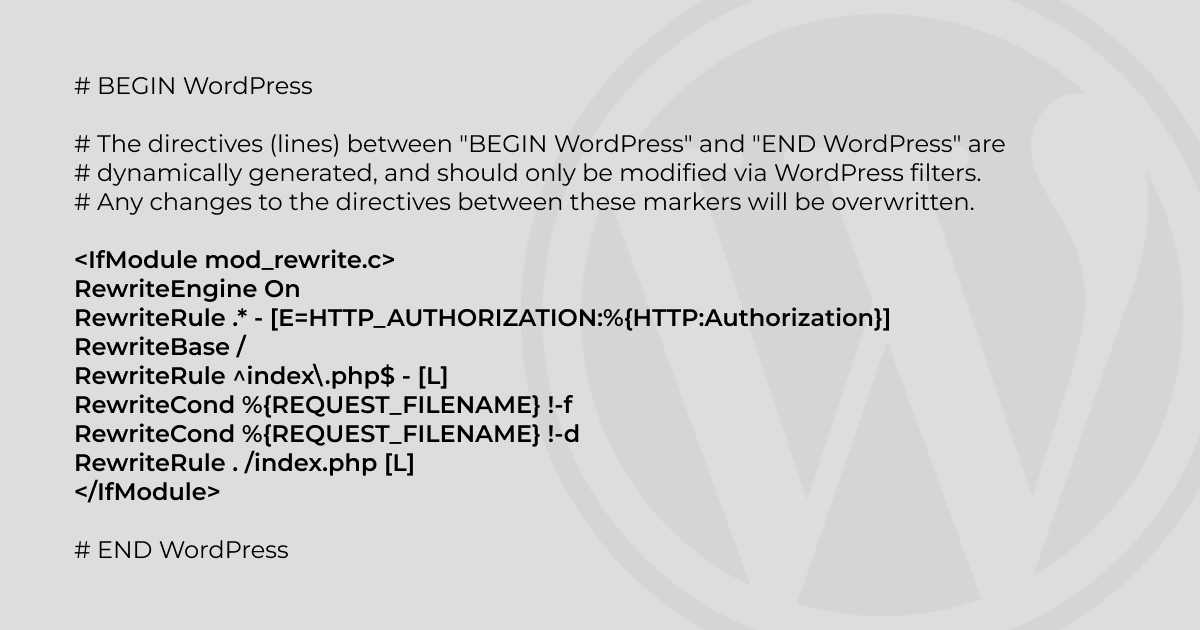
In the background WordPress will check if it has privileges to write in .htaccess. Since it has (from the www-data user), it will automatically add the required rewrite rules to the .htaccess file. If you cat .htaccess you’ll see that the content of the file changes, based on your selection in the Permalink Settings page.
# BEGIN WordPress
# The directives (lines) between “BEGIN WordPress” and “END WordPress” are
# dynamically generated, and should only be modified via WordPress filters.
# Any changes to the directives between these markers will be overwritten.<IfModule mod_rewrite.c>
RewriteEngine On
RewriteRule .* – [E=HTTP_AUTHORIZATION:%{HTTP:Authorization}]
RewriteBase /
RewriteRule ^index\.php$ – [L]
RewriteCond %{REQUEST_FILENAME} !-f
RewriteCond %{REQUEST_FILENAME} !-d
RewriteRule . /index.php [L]
</IfModule># END WordPress
It goes without saying that you’ll need to do everything from scratch, if at one time, you run wp-env destroy. wp-env destroy deletes all Docker containers, volumes and local files created in the containers.
And that’s about it. I hope you find this article useful.